Virtualizing Ubuntu Server 22.04 on PVE
  1. Proxmox VE/

Virtualizing Ubuntu Server 22.04 on PVE

668 words·4 mins
Table of Contents
Proxmox VE - This article is part of a series.
Part 3: This Article

1. Preparing the ISO Image
#

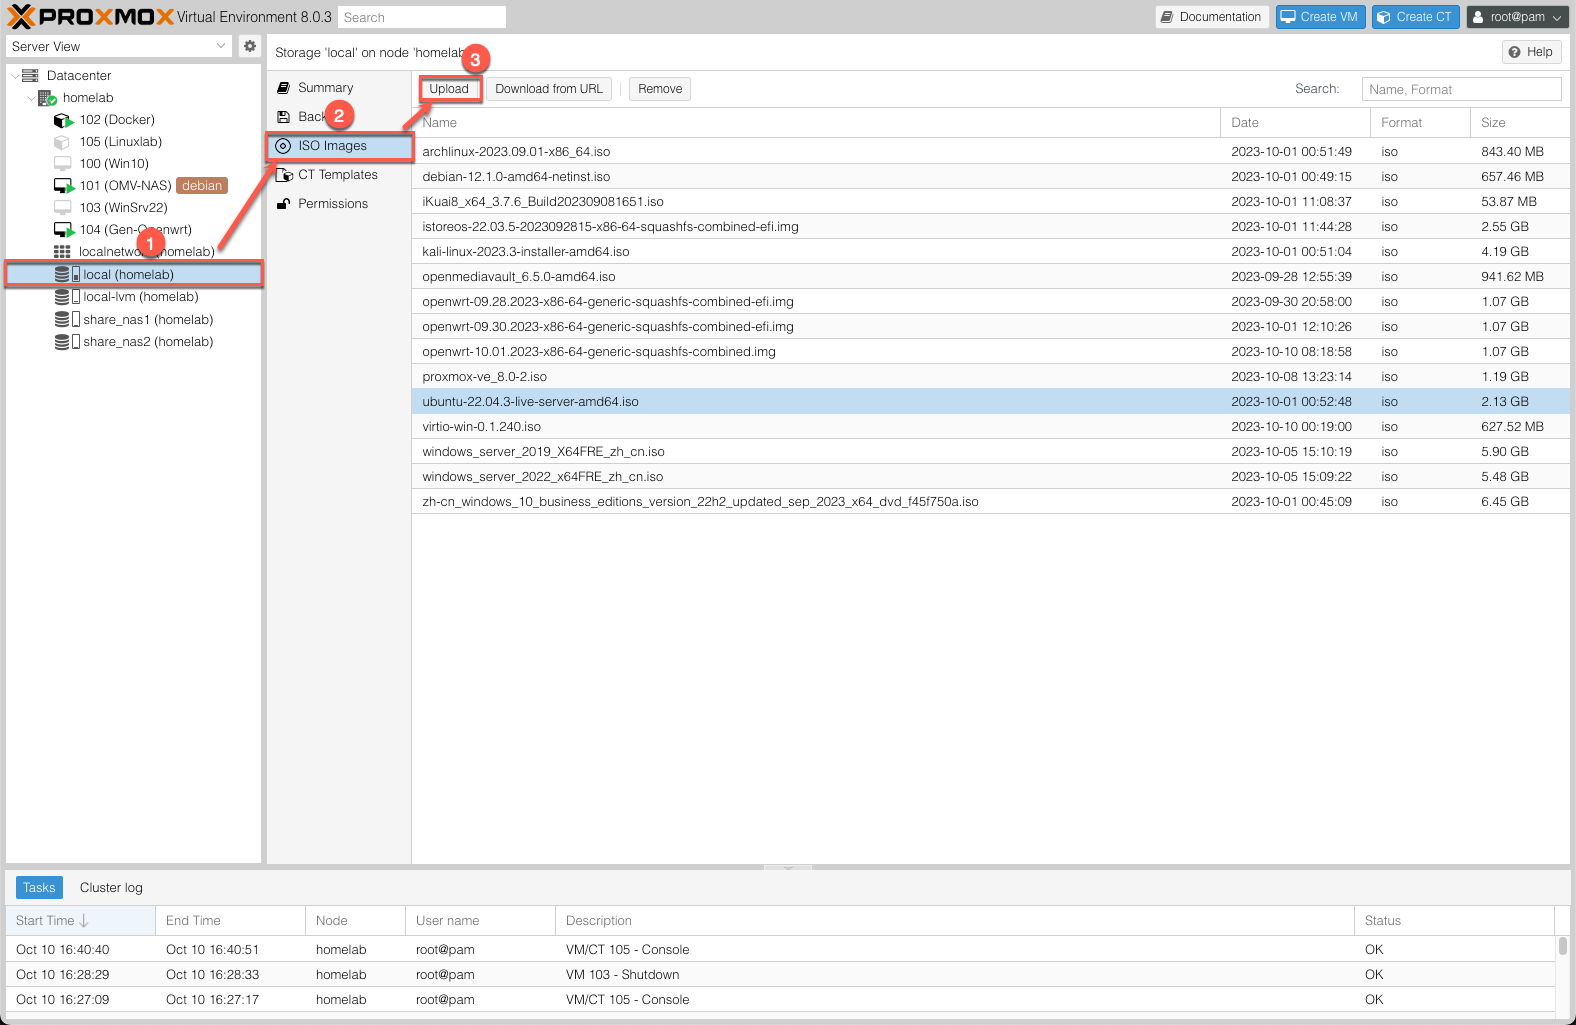
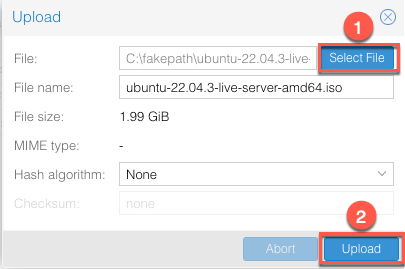
Before creating a Virtual Machine (VM), you need to prepare the ISO image for the operating system you want to install. The PVE WebGUI management interface provides two methods: local upload and online download.

Upload
#

In the PVE WebGUI management interface, expand the Node tree in the Resource Tree:

  1. Click local storage;
  2. In the Content Panel on the right, select ISO Images;
  3. Then click the Upload button.
    1.Create-VM-Ubuntu-upload
  4. In the pop-up window, select the ISO image you have already downloaded locally. Once confirmed, click Upload.
    2.Create-VM-Ubuntu-upload

Download
#

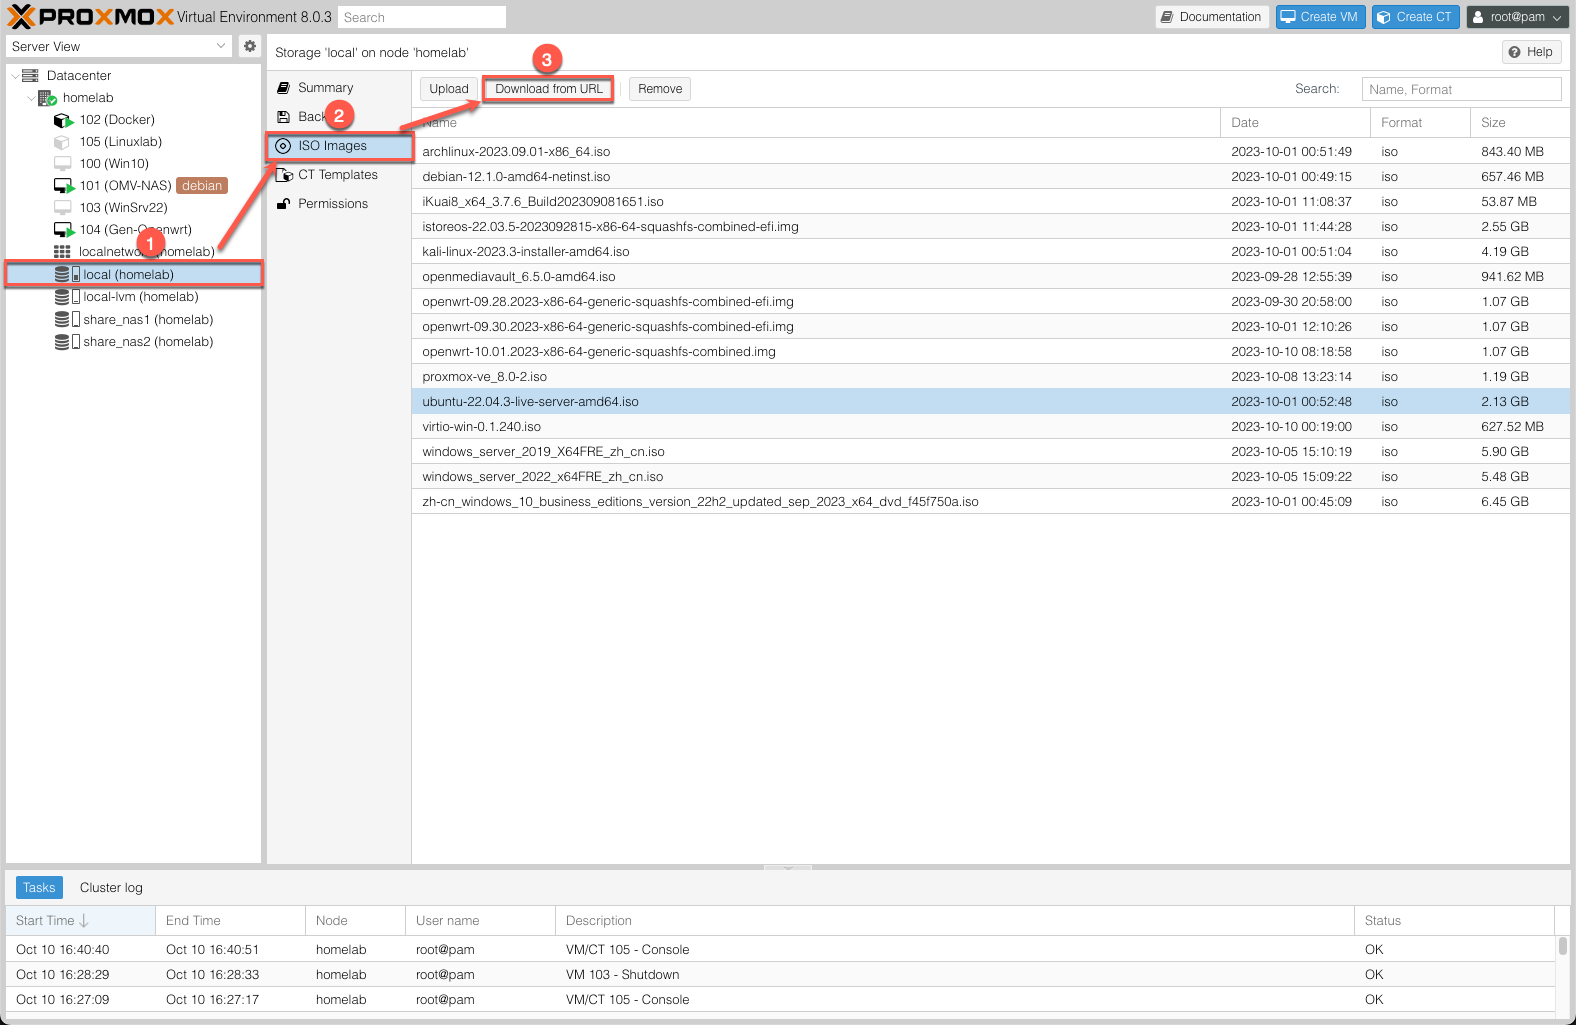
The download procedure is similar to uploading, except that in the local Content Panel you need to select Download from URL for an online download.

3.Create-VM-Ubuntu-download
In the pop-up window, enter the download URL for the ISO image, then click Query URL. The system will automatically retrieve the file name. 
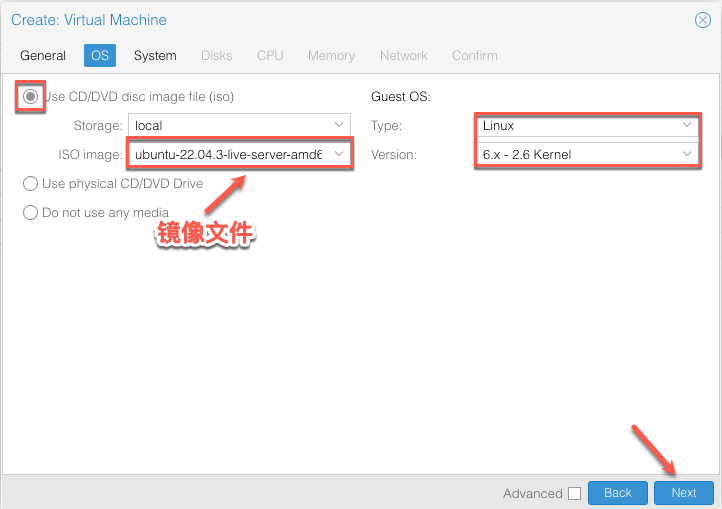
For example, to download Ubuntu Server 22.04, first copy the download URL into the dialog box, then click Query URL and wait for the system to detect the file name (in this case, ubuntu-22.04.3-live-server-amd64.iso). Finally, click Download and wait for the download to complete.
4.Create-VM-Ubuntu-download

It is recommended to use Download from URL — the online download method — for this task. Uploading an ISO image to the server requires downloading it to your local machine first and then uploading it to the server, which is time-consuming. Letting the server download the file directly is a one-step process that saves considerable effort.

Alternatively, you can switch to the Node’s Console (Shell) and use the wget command to download the ISO image directly to the system’s designated storage path.

2. Creating a Virtual Machine
#

In the PVE WebGUI management interface header, click the Create VM button on the right side to begin creating a VM.

5.Create-VM-Ubuntu

1. General Tab
#

  • Node: The physical server Node on which the VM will run.
  • VM ID: The VM identifier. In this example, the VM ID is 106.
  • Name: A name for the VM. Here it is named UbuntuSrv22.
    6.Create-VM-Ubuntu-general

2. OS Tab
#

  • ISO Image: Select the ISO image you prepared earlier.
  • Guest OS: Set the Guest operating system to Linux, version 6.x-2.6 Kernel.
    7.Create-VM-Ubuntu-os

3. System Tab
#

  • Graphic card: Leave at default.
  • Machine: Leave at default. If you need PCIe hardware passthrough, select the Q35 chipset.
  • BIOS Firmware: The default is SeaBIOS. If you need PCIe hardware passthrough, select OVMF firmware.
  • SCSI Controller: Select VirtIO SCSI single.
    8.Create-VM-Ubuntu-system

9.Create-VM-Ubuntu-system

4. Disks Tab
#

  • Bus/Device: The Bus defaults to SCSI.
  • Storage: Select local-lvm.
  • Disk size: Adjust the Disk size as needed. Here it is set to 32GB.
  • Cache: The default is No cache.
  • IO thread: Check this option.
    10.Create-VM-Ubuntu-disk

5. CPU Tab
#

  • Sockets: 1 CPU.
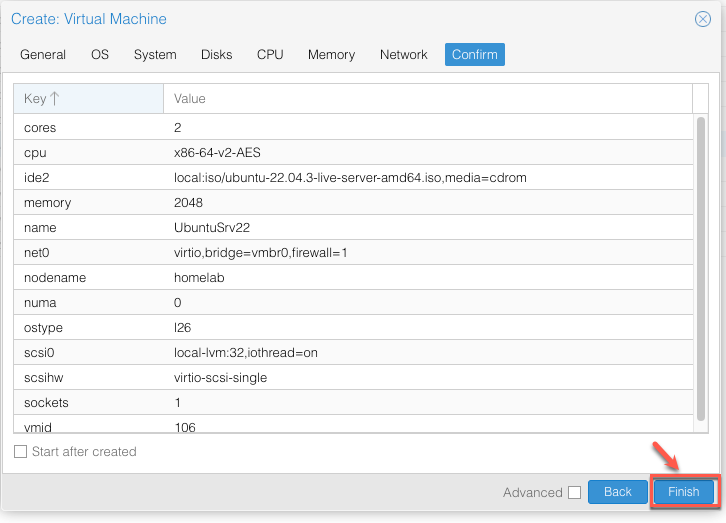
  • Cores: The number of CPU cores. Configure based on the VM’s intended use. Here it is set to 2 cores.
  • Type: The CPU type defaults to x86-64-v2-AES. Select a type that matches the host machine’s CPU — the default is usually sufficient. For a perfect match, set the CPU type to host, which gives the VM the exact same CPU capabilities as the host machine.

Note: Selecting host will affect VM migration.

11.Create-VM-Ubuntu-cpu

6. Memory Tab
#

  • Memory: Configure the memory size based on the VM’s intended use. Here it is set to 2GB.
    12.Create-VM-Ubuntu-memory

7. Network Device Tab
#

  • Bridge: Leave the Bridge at default.
  • Model: For maximum performance, use VirtIO (paravirtualized) as the network adapter.

If installing a Windows system, using VirtIO requires installing additional drivers.

13.Create-VM-Ubuntu-network

8. Confirm VM Configuration
#

Review the VM configuration and click Finish to complete the VM creation.

14.Create-VM-Ubuntu-comfirm

15.Create-VM-Ubuntu-finish

3. Installing Ubuntu on the Virtual Machine
#

Once the VM is ready, you can proceed with installing the Guest operating system.

1. Starting the Installer
#

Select the newly created VM 106. In the VM’s Content Panel, click Console to open the Console, then click Start Now to boot the VM.

16.install-VM-Ubuntu

2. Completing the Installation
#

Follow the Ubuntu installer prompts step by step to complete the installation.

17.install-VM-Ubuntu-

18.install-VM-Ubuntu-
The login screen after a successful installation
19.install-VM-Ubuntu-success

Proxmox VE - This article is part of a series.
Part 3: This Article